-
-
 MCP Overview
 - Introduction
- Setup Guide
-
-
-
 Resources
 - Use Cases & Prompts
-
Setup Guide
Step-by-step guide to connect the Cite AI MCP Server with Claude, Cursor, or ChatGPT. Need help? Contact us at support@citehq.ai
Server URL
All supported platforms use the same MCP server URL:
https://api.citehq.ai/mcpWhen connecting for the first time, you’ll be prompted to sign in to Cite AI and authorize access. Once connected, your session remains active across conversations, so you won’t need to reconnect each time.
Claude Desktop and Web (claude.ai)
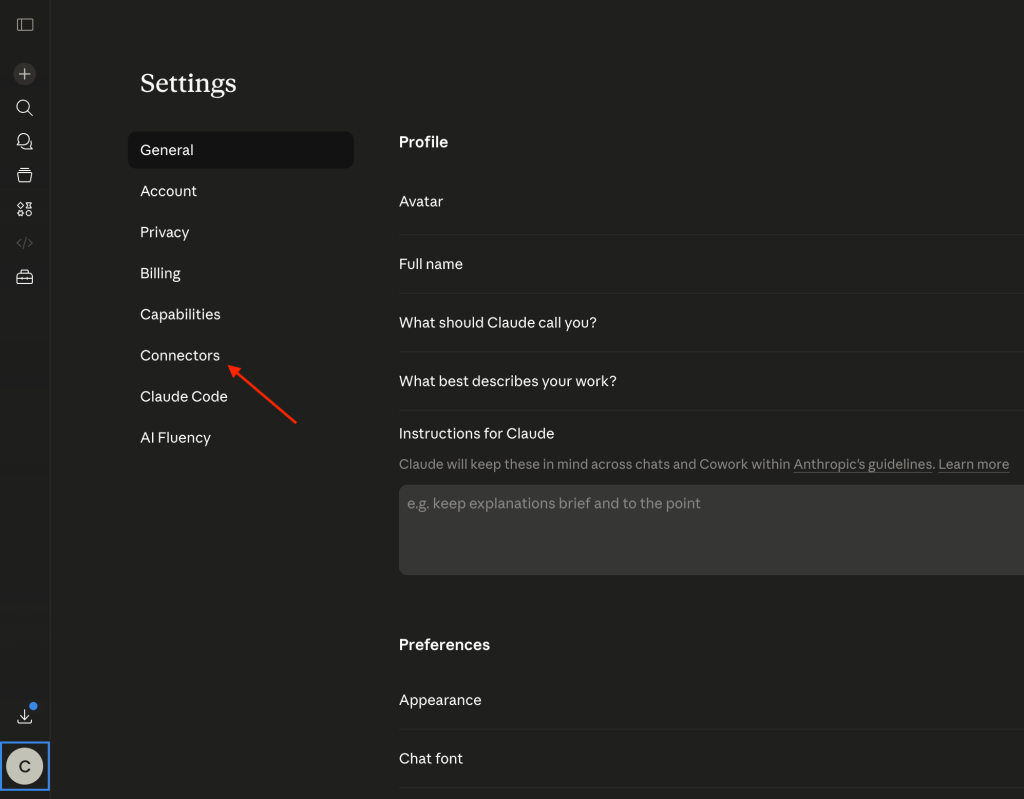
1) Open settings
Open Claude Desktop and go to Settings, then Connectors.
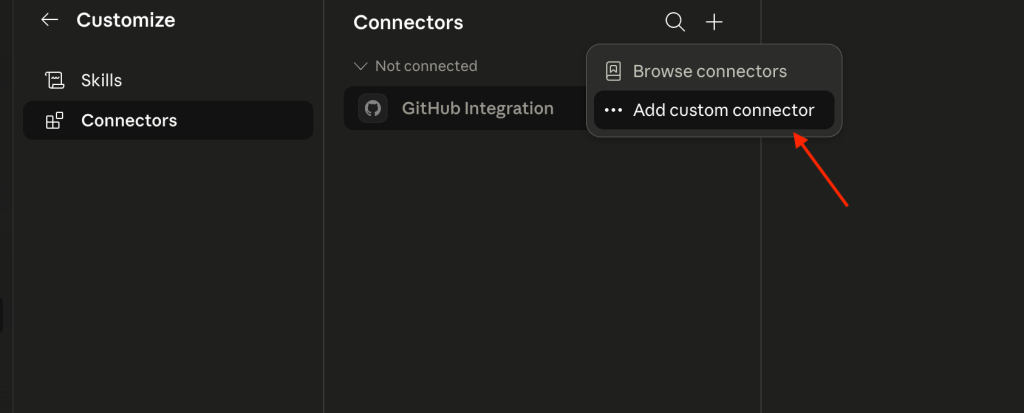
2) Add a Custom Connector
Choose the option to add a custom connector.
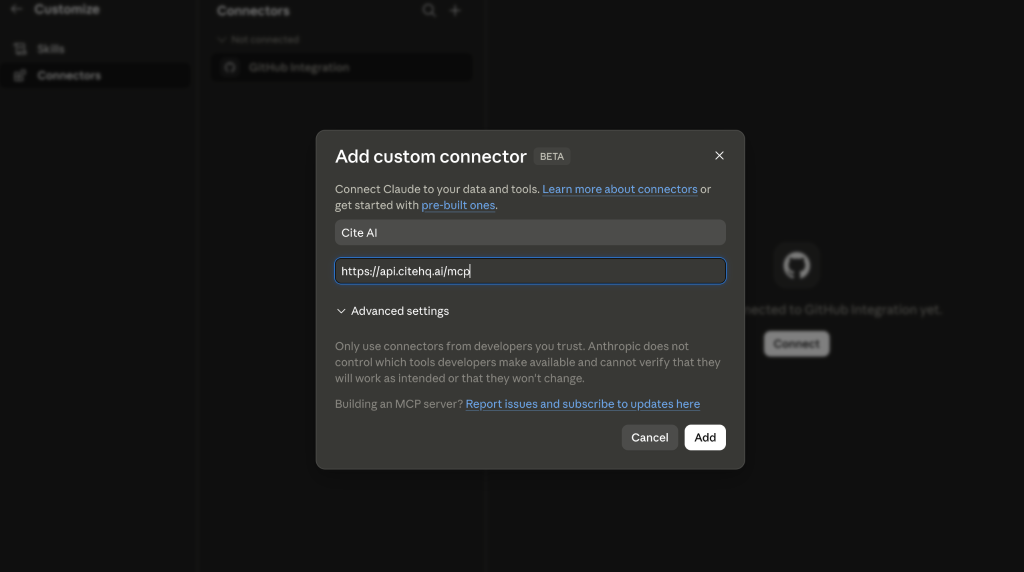
3) Add Cite AI Server URL
Paste the Cite AI MCP server URL: https://api.citehq.ai/mcp when prompted. Claude will then guide you through the authentication flow and connect Cite AI as an available MCP tool inside your conversations.
Claude Code (CLI)
Run this command in your terminal:
claude mcp add cite-ai --transport streamable-http https://api.citehq.ai/mcpClaude will prompt you to authorize access the first time you use a Cite AI MCP tool.
Cursor
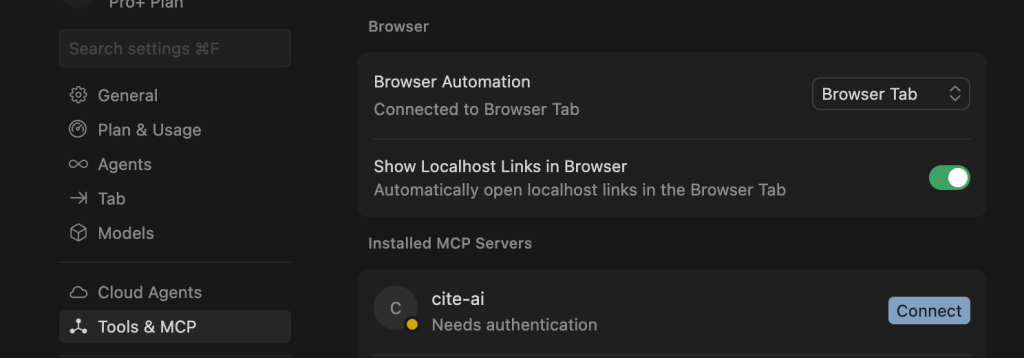
1. Open MCP Settings
Open Cursor Settings, then navigate to: Tools & MCP
2. Add the Cite AI MCP Server
Add the following configuration to your mcp.json file and save the changes:
{
  "mcpServers": {
    "cite-ai": {
      "url": "https://api.citehq.ai/mcp",
      "transport": "streamable-http"
    }
  }
}
The first time you use the server, Cursor will prompt you to sign in and authorize access through Cite AI.
VS Code (GitHub Copilot)
Add a .vscode/mcp.json file to your workspace, or open the user-level configuration using the MCP: Open User Configuration command.
{
  "servers": {
    "cite-ai": {
      "type": "http",
      "url": "https://api.citehq.ai/mcp"
    }
  }
}
Once added, VS Code will prompt you to authorize access through your Cite AI account the first time you use the MCP server.
Other Platforms
The Cite AI MCP Server uses Streamable HTTP transport and works with AI tools that support the MCP standard.
Use the following server URL during setup:
https://api.citehq.ai/mcpVerify Your Connection
After setup, try asking:
List my Cite AI projects
If your projects appear successfully, the connection is working correctly.
You can then start asking questions like:
- “How has our AI visibility changed this month?”
- “Which competitors are outperforming us in ChatGPT?”
- “What prompts are driving the most visibility?”
Troubleshooting
“Authorization failed” or “Unauthorized”
- Make sure you signed in with the correct Cite AI account
- Remove and reconnect the MCP integration
- Clear browser cookies for api.citehq.ai and try again
“No projects found”
- Confirm your account has access to at least one active Cite AI project
Connection timeout
- Check your internet connection
- Verify the MCP server URL is exactly: https://api.citehq.ai/mcp
Need help? Contact support@citehq.ai
 On this page
- Server URL
- Claude Desktop and Web (claude.ai)
- 1) Open settings
- 2) Add a Custom Connector
- 3) Add Cite AI Server URL
- Claude Code (CLI)
- Cursor
- 1. Open MCP Settings
- 2. Add the Cite AI MCP Server
- VS Code (GitHub Copilot)
- Other Platforms
- Verify Your Connection
- Troubleshooting
- “Authorization failed” or “Unauthorized”
- “No projects found”
- Connection timeout